From Osi
Add Demographic Information
Add demographic information about the employee for reporting purposes. Demographic information includes date of birth, gender, marital status and number of dependents. All demographic information is optional.
| In the person's record under the "Individual Information" section, click Add Demographic Information. | 
|
The Demographic Information form opens.
Set the employee's Date of Birth.
Select the employee's Gender.
Select the employee's Marital Status.
Enter the Number of Dependents for the employee.
Click Confirm and confirm that the information entered is correct. If it is not correct, click Edit to change it. If it is, click Save to save it. | 
|
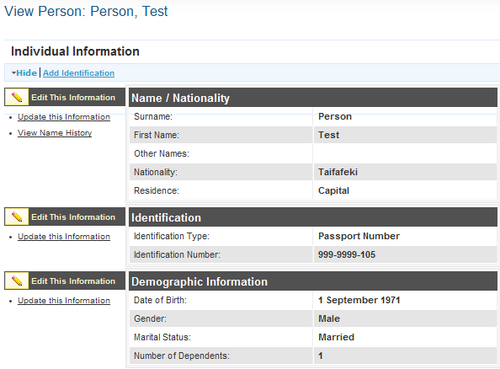
| The demographic information that you just entered displays in the employee's record. If any of the information needs to be changed, click Update This information to edit it. | 
|
Troubleshooting
The correct marital status is not available for selection.
Only the HR Manager can add new marital statuses to the system (see Add a marital status).
Add Passport Photo
Your organization may require employees to submit a current passport photo. Upload a passport photo to the person's record.
| In the person's record under the "Individual Information" section, click Add Passport Photo. | 
|
The Add/Update Passport Photo form opens.
Under Image, click Browse to find the image you want to upload.
Enter the Date using the date picker. Add a Description of the passport photo.
Click Save to save the passport photo in the person's record. | 
|
| The passport photo that you just uploaded displays in the employee's record. To update a passport photo, click Update this Information and add the new photo. | 
|
Add Resume
You can also upload a resume to the person's record.
| In the person's record under the "Individual Information" section, click Add Resume. | 
|
The Add/Update Resume form opens.
Under Document, click Browse to find the document you want to upload.
Enter the Date using the date picker. Add a Description if necessary.
Click Save to save the resume in the person's record. | 
|
| The resume that you just uploaded displays in the employee's record. To update a resume, click Update this Information and add the new document. | 
|
Add Identifications
Your organization may require one or more identifications from employees and job applicants. Add this identification information to the person's record. Multiple identifications may be added for a single person.
| In the person's record under the "Individual Information" section, click Add Identification. | 
|
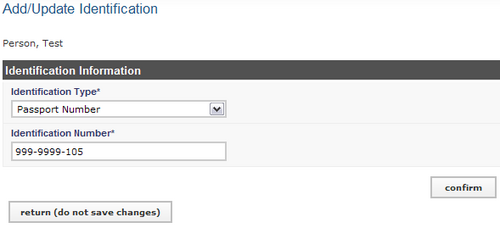
The Identification form opens.
Select the Identification Type.
Enter the number or other identifier for the identification in the Identification Number box.
Click Confirm and confirm that the information entered is correct. If it is not correct, click Edit to change it. If it is, click Save to save it. | 
|
| The identification information that you just entered displays in the employee's record. Additional identifications can now be added. For each identification, click Add Identification and add the new identification. If any of the identification information needs to be changed, click Update This information beside the incorrect identification to edit it. | 
|
Troubleshooting
An error message appears when the Confirm button is clicked.
Make certain that all required fields have been completed. Required fields are outlined in red. Fill in the missing information and try saving again. If you do not want to add an identification after all, click Return (do not save changes).
The identification type is not available for selection.
Only the HR Manager can add new identification types to the system (see Add an identification type).
Add Contact Information
For each person in the system, whether an employee or a job applicant, four types of contact information may be added: personal, or home, contact; work contact; emergency contact; and other contact. Only one contact may be added for each type. Contact information may be added at any time after the record is created. All contact fields are optional.
| In the employee's record, click Contact Information in the side menu to jump to the "Contact Information" section of the record. Click the link for the type of contact information to add. | 
|
The Contact Information form opens.
Enter the full Mailing Address.
Enter a primary Telephone Number.
Enter an Alternate Telephone Number, such as a mobile phone.
Enter a Fax Number.
Enter an Email Address.
Enter any Notes, such as the name of an emergency contact.
Click Confirm and confirm that the information entered is correct. If it is not correct, click Edit to change it. If it is, click Save to save it. | 
|
The contact information that you just entered displays in the employee's record.
Repeat these steps for each type of contact to add for the person.
If any of the information needs to be changed, click Update This information beside the incorrect contact information to edit it. | 
|
Troubleshooting
The correct Add Contact link doesn't appear.
Make certain that contact information hasn't already been added. For example, if the Add Personal Contact link doesn't appear, check the "Contact Information" section of the employee's record for a "Personal Contact" section. You can then change the previously entered contact information.


